Oracle Tutorial
The fundamentals of the Oracle database are simple to learn and will take little time. You’re in the right place if you want to study Oracle databases from scratch. For those who are new to using relational databases, this Oracle tutorial was intended.
What will you learn?
- Understanding the Oracle Database
- What is Oracle?
- Why Oracle Database?
- Installing Oracle Database
- Oracle Basics
- Oracle Data Types
- Oracle Constraints
Understanding the Oracle Database
This section will be a great place to start if you have never worked with an Oracle database or any other relational database systems (RDBMS), such as SQL Server, MySQL, or PostgreSQL.
What is Oracle?
A database is a group of data that is handled collectively. A database management system (DBMS) allows multiple users to access the same data at once by storing, managing, and retrieving vast amounts of data in a multiuser setting.
The Oracle Database is a reliable object-relational database that offers database users practical and efficient solutions, including high performance, security against unauthorized access, and quick failure recovery.
Hardware and Software Prerequisites
- 1 GB of physical memory
- Sufficient paging space
- Appropriate service packs and patches
- Appropriate file system format
- Install Oracle Database Software
- Oracle Enterprise Manager Express.
Why Oracle?
It is possible to find additional RDBMS products in addition to the Oracle Database. Here are a few noteworthy ones:
- Db2 from IBM.
- Microsoft SQL Server.
- The most widely used open-source database, also developed by Oracle, is MySQL.
- The most sophisticated open-source database is PostgreSQL.
Features of Oracle
You may store and retrieve data quickly and safely with the Oracle Database. The Oracle Database offers the following benefits:
- Cross-platform: Oracle is compatible with a wide range of hardware and operating systems, including Windows Server, Unix, Linux, and others.
- Simple integration: Oracle facilitates seamless communication between applications running on multiple platforms and the Oracle database.
- Oracle databases are ACID-compliant and contribute to the reliability and integrity of data.
- Flexible in the face of emerging technologies: Oracle was among the first databases to support GNU/Linux.
The Oracle database also has the following structural benefits:
- Logical data structure
- Partitioning
- Memory caching
- Data dictionary
- Backup and recovery
- Clustering
Editions of Oracle Database
- Oracle Enterprise Edition (EE): Common and expensive
- Oracle Standard Edition (SE): Enterprise use
- Oracle Express Edition (XE): Free to use with limited features.
Installing Oracle Database
You must download the installer from the Oracle website’s download page to install the Oracle database on your PC.
Once the installation files are downloaded in ZIP format, you must extract them onto your computer and place them in a designated folder.
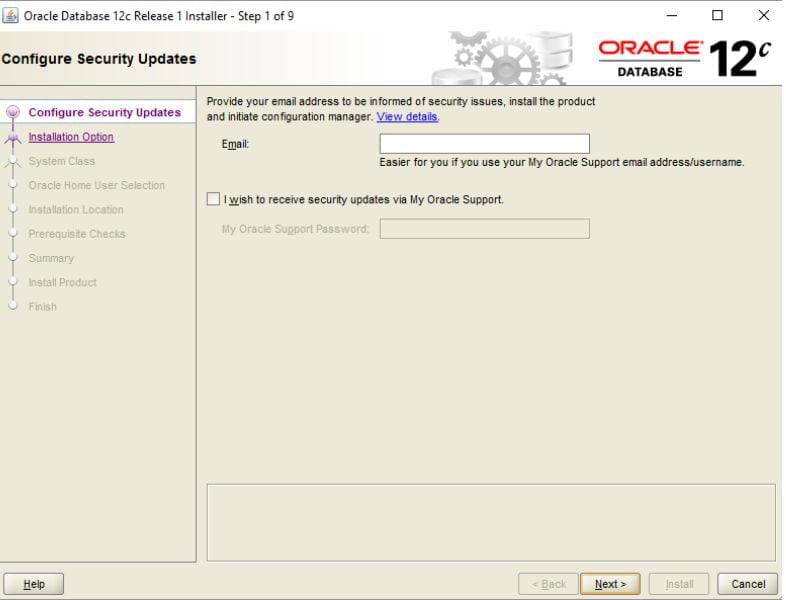
To begin the installation procedure, double-click the setup.exe file at this point. There are 9 steps in the installation of the Oracle database.
Step 1: Once you double-click the setup.exe file, it asks for your email address for security purposes. You can skip it by giving it next.
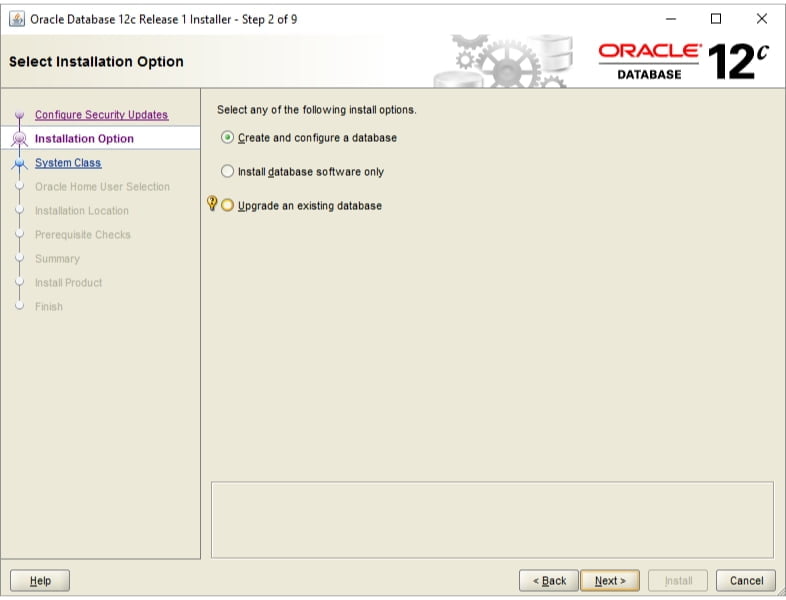
Step 2: Here, you have three choices. Select option 1 and press the Next button if this is your first time installing an Oracle database. If you want to update the current one, select “upgrade an existing database.”
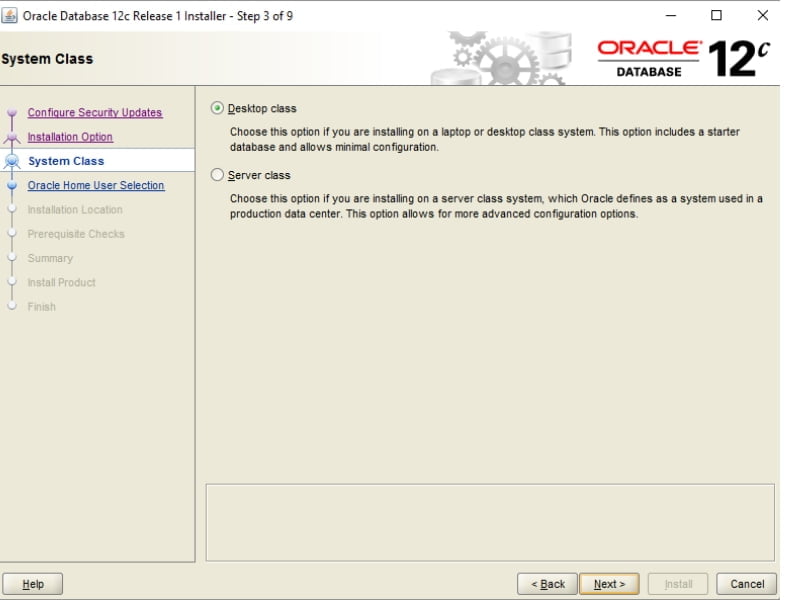
Step 3: You should select the system class during the installation. After selecting Desktop Class as the first choice, press the Next button.
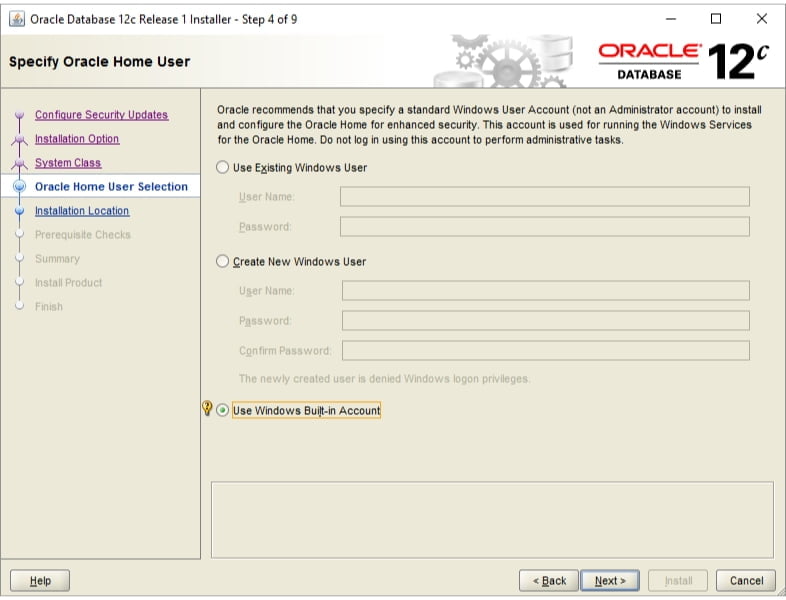
Step 4: In this step, you can install and configure Oracle Home for enhanced security by specifying the Windows user account. Select the third option, “Use Windows Built-in Account.”
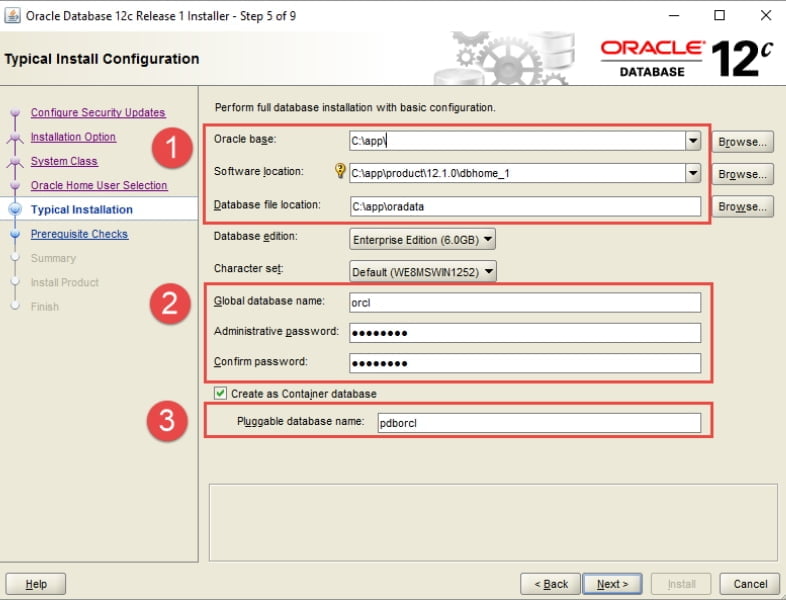
Step 5: This step allows you to select the pluggable database name, global database name, and password, as well as the location where the Oracle database will be installed.
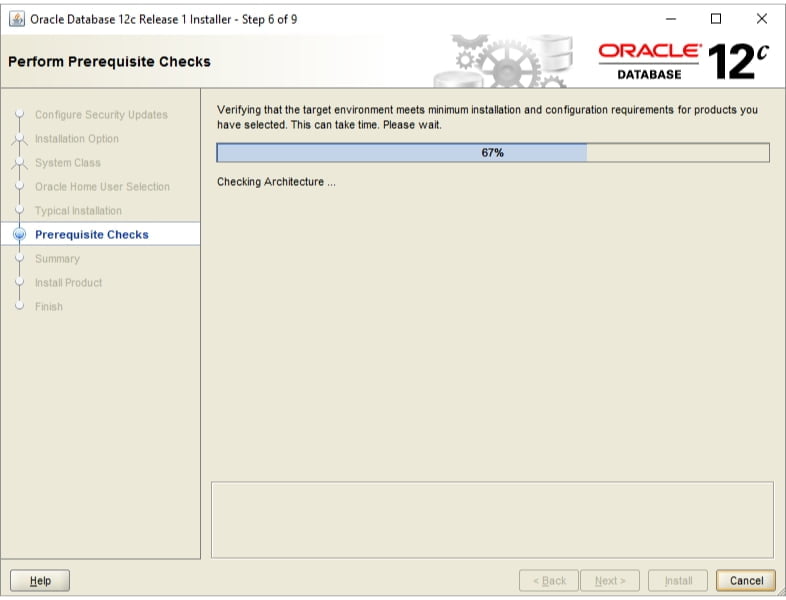
Step 6: The prerequisite check is carried out in this step.
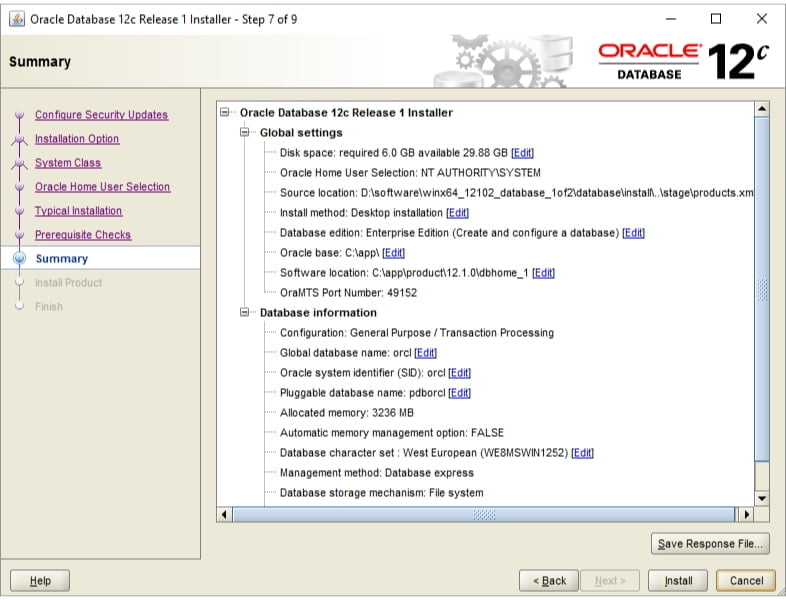
Step 7: Once the information you submitted is shown, check it over and, if everything checks out, click the install button.
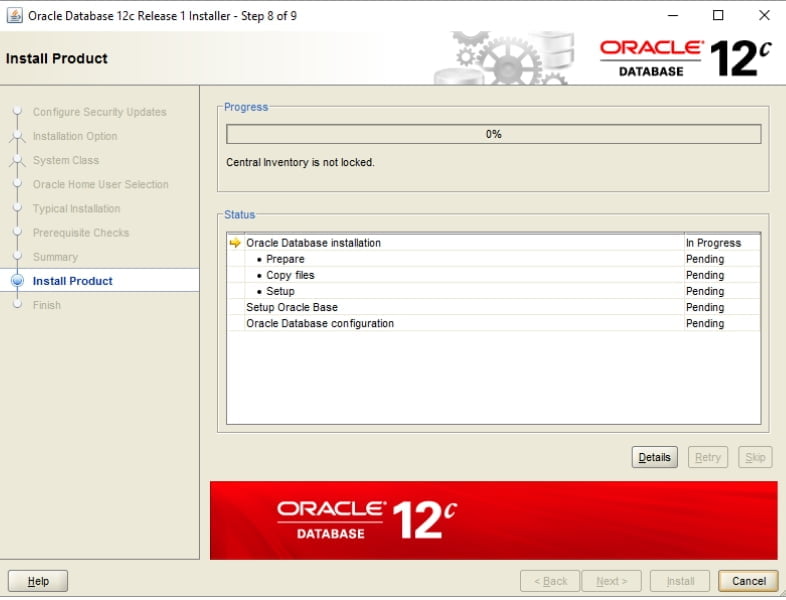
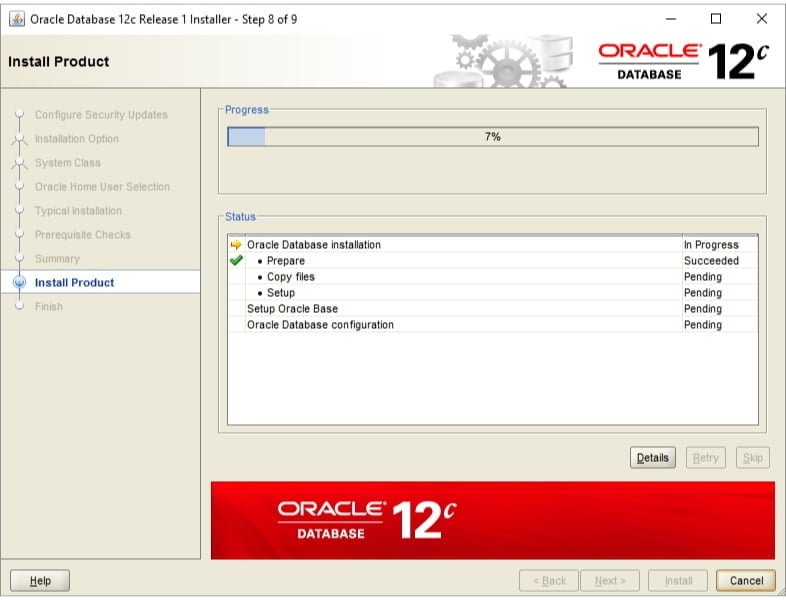
Step 8: The Oracle database installation process begins when the installer launches. It should take a few minutes to complete, depending on your computer.

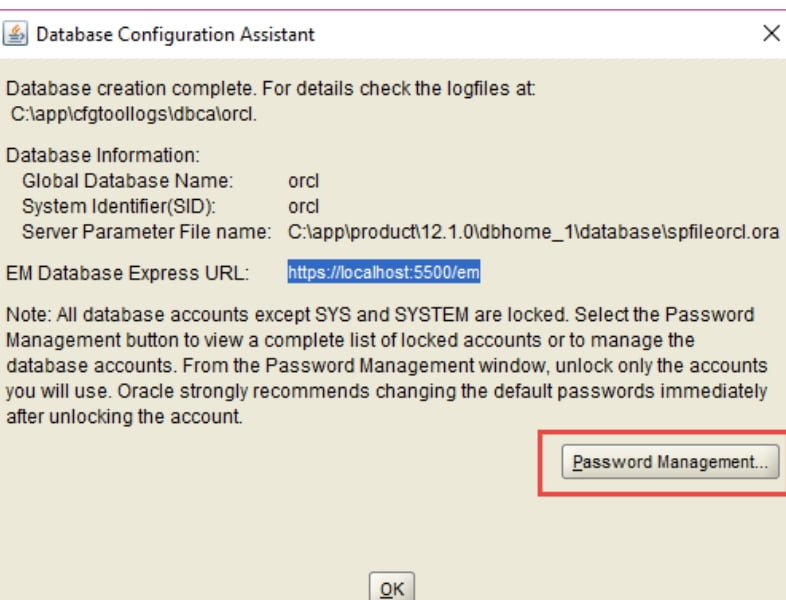
You’ll see the Database Configuration Assistant window. To enter passwords for Oracle database accounts, click the Password Management icon.
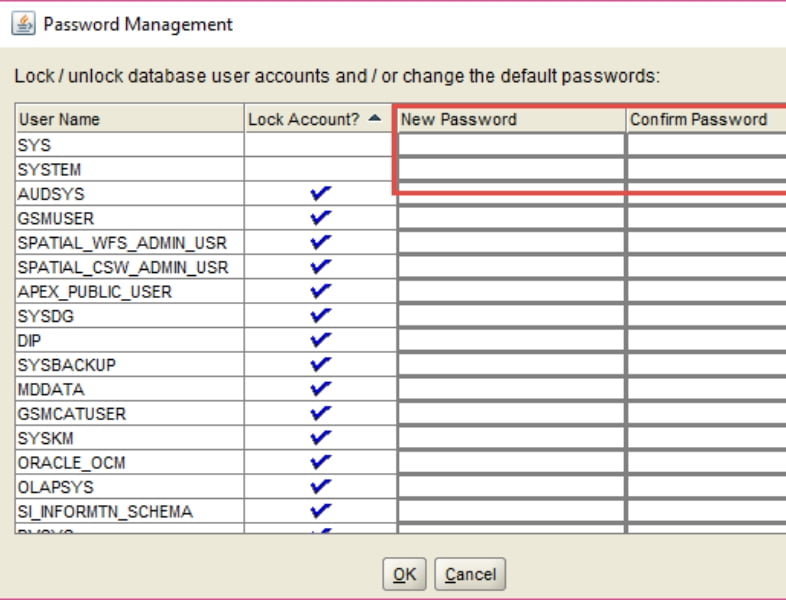
Enter the passwords for the SYS and SYSTEM accounts, then click OK.
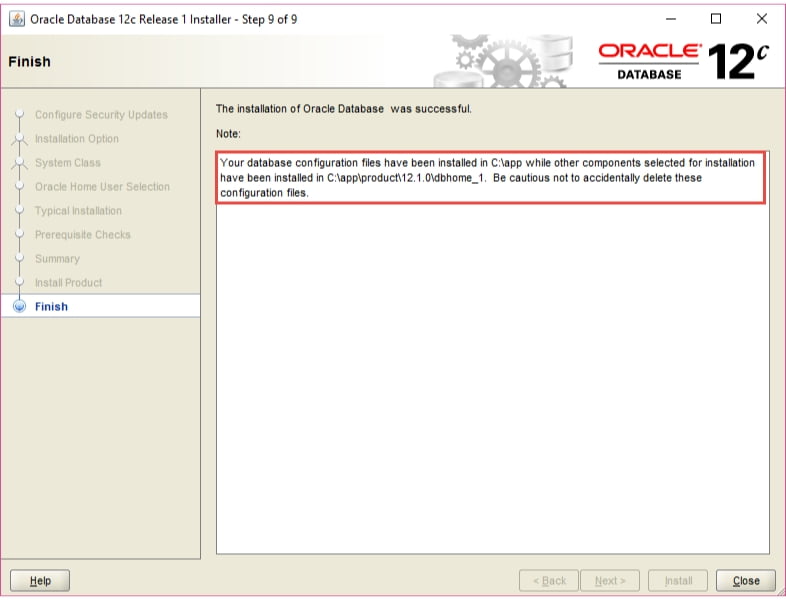
Step 9: When installation is completed successfully, the installer will notify you, as shown in the screenshot below. Just click the Close button to end the window.
Checking the connection with the database
- Launch the Oracle Database’s SQL developer application.
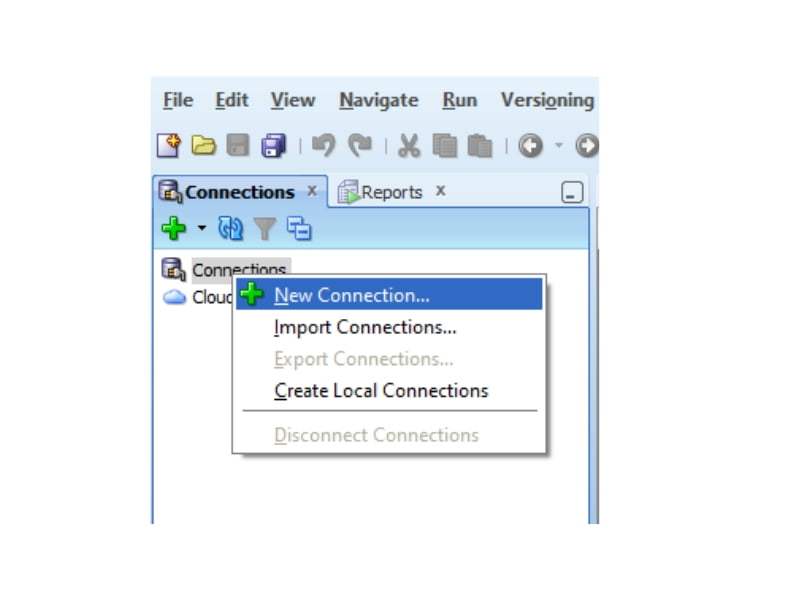
- To make a new connection, right-click on the connections node and select New Connection from the menu.
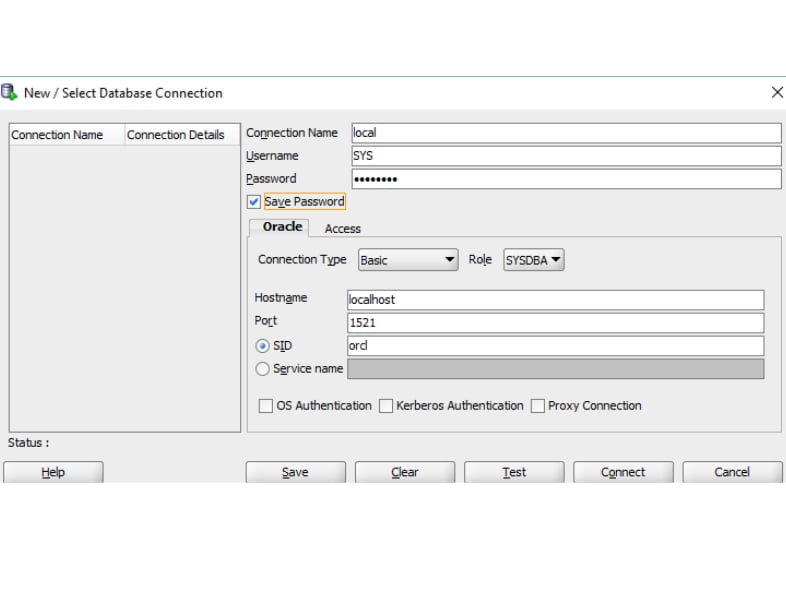
- Enter the information you gave during the installation procedure, as illustrated in the screenshot below. To connect to the Oracle database, simply click the Connect button.
- Every object will appear as follows in SQL Developer.
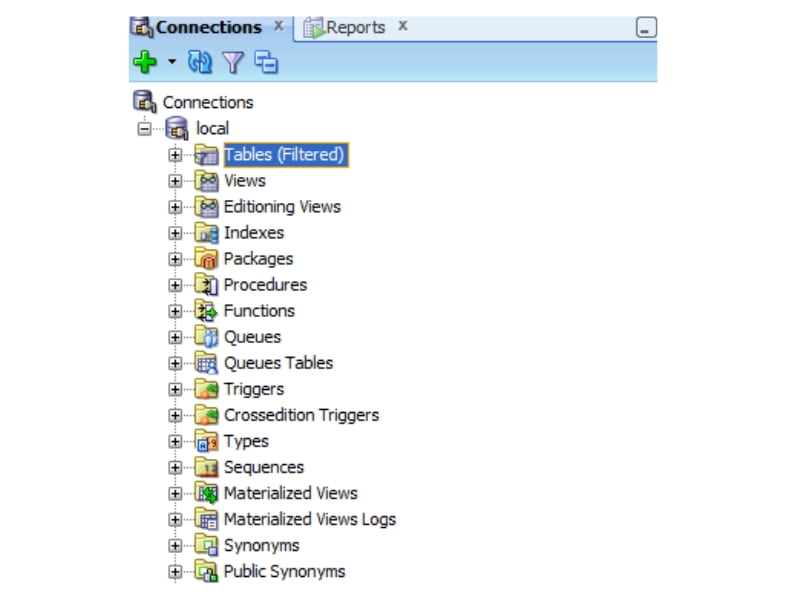
Kudos! Oracle Database 12c has been installed successfully.
Oracle Basics
The principles of the Oracle database are covered in the section on Oracle basics. Helping you build a strong foundation in the Oracle database is the main objective of this tutorial series.
Section 1: Querying Data
To start, below is a basic query that pulls information from a single table.
SELECT Query: It demonstrates how to run a query over data in a single table.
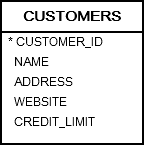
Tables in Oracle are made up of rows and columns.
For example, the customer_id, name, address, website, and credit_limit columns are present in the sample database’s customers table.
These columns contain data from the customer’s table as well.
The SELECT statement with the following syntax is used to retrieve data from one or more table columns:
SELECT
column_1,
column_2,
…
FROM
table_name;
You can select customer details as follows:
- Select data from a single column
- Select data from multiple columns
- Select all columns of a table.
Section 2: Sorting Data
Order By: Sort the query result set in either ascending or descending order using this option.
An Oracle table keeps its rows in an indeterminate order, regardless of how they were entered into the database. You must specifically inform Oracle Database if you wish to query rows based on a column in either ascending or descending order.
One possible way to display all of your clients is to list them alphabetically by name or by credit limit.
The SELECT statement’s ORDER BY clause is added as follows to sort the data:
SELECT
column_1,
column_2,
column_3,
…
FROM
table_name
ORDER BY
column_1 [ASC | DESC] [NULLS FIRST | NULLS LAST],
column_1 [ASC | DESC] [NULLS FIRST | NULLS LAST],
…
The sort order can be as follows after the column name:
- ASC for sorting in ascending order
- DESC for sorting in descending order
You can use “order by” for the following sorting requirements:
- Sort rows by column
- Sort rows by multiple columns
- Sort rows by column’s position
- Sort rows by null values
- Sort rows by the result of a function
- Sort by date
Section 3: Filtering Data
DISTINCT: Remove duplicate rows from a query’s output.
Syntax:
SELECT DISTINCT column_1
FROM table;
Code lang
WHERE: Discover how to give a condition for each row in the result set that a query returns.
Syntax:
SELECT
select_list
FROM
table_name
WHERE
search_condition
ORDER BY
sort_expression;
Code lang
AND: Concatenate two or more Boolean expressions; if all expressions are true, return true.
The AND operator has the following syntax:
expression_1 AND expression_2
OR: Join two or more Boolean expressions and, if at least one of them is true, return true.
The OR operator’s syntax is demonstrated as follows:
expression_1 OR expression_2
FETCH: demonstrates how to use the row limiting clause to restrict the number of rows a query returns.
The row-limiting clause’s syntax is seen in the following example:
[ OFFSET offset ROWS]
FETCH NEXT [ row_count | percent PERCENT ] ROWS [ ONLY | WITH TIES ]
Code
Example
SELECT
product_name,
quantity
FROM
inventories
INNER JOIN products
USING(product_id)
ORDER BY
quantity DESC
FETCH NEXT 10 ROWS ONLY;
IN: Ascertain whether a given value corresponds to any value in a subquery or list.
Finding out if a value matches any values in a list or subquery is done using the Oracle IN operator.
The following is the syntax of the Oracle IN operator, which checks if an expression matches a list of values:
expression [NOT] IN (v1,v2,…)
Programming language: A subquery’s syntax and an expression match in Structured Query Language (SQL):
expression [NOT] IN (subquery)
BETWEEN: Use a range of values to filter data.
The range to be tested can be specified using the BETWEEN operator. Rows generated by a SELECT query that has a search criterion set using the BETWEEN operator only return rows whose values fall inside the specified range.
The BETWEEN operator’s syntax is demonstrated as follows:
expression [ NOT ] BETWEEN low AND high
LIKE: Match data according to predefined patterns.
There are occasions when you wish to query data according to a particular pattern. For instance, you might want to locate people whose first names finish in “er” or whose last names begin in “St.” Use the Oracle LIKE operator in this situation.
The Oracle LIKE operator has the following syntax:
expression [NOT] LIKE pattern [ ESCAPE escape_characters ]
IS NULL and IS NOT NULL: Determine whether a value or expression in a column is NULL or not.
The following SELECT query attempts to retrieve all sales orders that do not have a responsible salesman attached to them:
SELECT * FROM orders
WHERE salesman_id = NULL
ORDER BY order_date DESC;
Section 4: Joining Tables
Based on the values of the linked columns, an Oracle join is used to merge columns from two or more tables. The primary key column(s) of the first table and the foreign key column(s) of the second table are usually related columns.
Inner Join: Use the INNER JOIN clause to query data from two or more linked tables. The way to combine two tables, T1 and T2, is shown in the following sentence.
SELECT
*
FROM
T1
INNER JOIN T2 ON join_predicate;
Left Join: It allows you to choose which rows in the left table match or do not match the rows in the right table.
SELECT
column_list
FROM
T1
LEFT JOIN T2 ON
join_predicate;
Right Join: It can be used to find out which rows in the left table match or don’t match rows in the right table.
SELECT
column_list
FROM
T1
RIGHT OUTER JOIN T2 ON
join_predicate;
Full Outer Join: To query data from two tables, you can use the complete join or full outer join.
SELECT
select_list
FROM
T1
FULL OUTER JOIN T2 ON join_condition;
Cross Join: The Cartesian product of the rows and columns of the two unrelated tables is what you get when you cross-join them.
SELECT
column_list
FROM
T1
CROSS JOIN T2;
Self Join: A join that unites a table with itself is called a self-join. When comparing rows within a table or querying hierarchical data, a self-join is helpful.
SELECT
column_list
FROM
T t1
INNER JOIN T t2 ON
join_predicate;
Section 5: Grouping Data
You will learn how to use “Group By” and “Having” clauses:
Group By: In a SELECT statement, the arrange BY clause is used to arrange rows based on column or expression values into a set of summary rows. One row per group is returned by the GROUP BY clause.
SELECT
column_list
FROM
T
GROUP BY c1,c2,c3;
Having: One optional clause in the SELECT statement is the HAVING clause. It is employed to filter sets of rows that the GROUP BY clause returns. For this reason, the GROUP BY clause and the HAVING clause are frequently used together.
SELECT
column_list
FROM
T
GROUP BY
c1
HAVING
group_condition;
Section 6: Subquery
Subquery: You can use them for sophisticated data selection methods.
A subquery is an INSERT, UPDATE, DELETE, or SELECT statement nestled inside another statement. Generally, a subquery can be utilized anytime an expression is used.
SELECT
MAX( list_price )
FROM
products;
Correlated Subquery: You can use the correlated subquery, which is dependent on the results that the outer query returns.
SELECT
product_id,
product_name,
list_price
FROM
products
WHERE
list_price =(
SELECT
MIN( list_price )
FROM
products
);
EXISTS and NOT EXISTS: It is used to verify whether the rows a subquery returns are present.
SELECT
*
FROM
table_name
WHERE
EXISTS(subquery);
ANY, SOME, and ALL: You can evaluate a value against a subquery or list. Keep in mind that ANY and SOME are interchangeable because they are the same.
Any: operator ANY ( v1, v2, v3)
operator ANY ( subquery)
Some: operator SOME ( v1)
operator SOME ( subquery)
All: operator ALL ( v1, v2, v3)
operator ALL ( subquery)
Section 7: Set Operators
You will learn how to combine result sets from two or more independent queries by using the set operators.
UNION: You can create a single result by combining the answers to two queries.
A set operator called the UNION operator creates a single result set by combining the result sets of two or more SELECT operations.
SELECT
column_list_1
FROM
T1
UNION
SELECT
column_list_1
FROM
T2;
INTERSECT: You can create an intersection between two separate queries’ results.
After comparing the results of two searches, the Oracle INTERSECT operator delivers the unique rows that are generated in both queries.
SELECT
column_list_1
FROM
T1
INTERSECT
SELECT
column_list_2
FROM
T2;
MINUS: Acquire the skill of deducing one result from another.
When two queries are compared, the Oracle MINUS operator provides unique rows from the first query that are not produced with the second query. Stated differently, one result set is subtracted from another using the MINUS operator.
SELECT
column_list_1
FROM
T1
MINUS
SELECT
column_list_2
FROM
T2;
Oracle Data Types
An overview of the built-in Oracle data types is provided by Oracle Data Types.
NUMBER: The numeric data type used to build columns with numbers in a table. Numerical values that can be either positive or negative are stored using the Oracle NUMBER data type.
NUMBER[(precision [, scale])]
FLOAT: The subtype of the NUMBER data type in Oracle is called FLOAT. Its primary goal is to make ANSI SQL FLOAT data types more compatible.
Float(p)
CHAR: Fixed-length character strings can be stored using the Oracle CHAR data type. Character strings with sizes ranging from 1 to 2000 bytes can be stored using the CHAR data type.
CHAR(length BYTE)
CHAR(length CHAR)
NCHAR: Fixed-length Unicode character data is stored in the Oracle NCHAR datatype. Only AL16UTF16 or UTF8, which is designated as the national character set at the time the database is created, may be used as the NCHAR character set.
CREATE TABLE nchar_demo (
description NCHAR(10)
);
VARCHAR2: The Oracle VARCHAR2 data type is used to store character strings with various lengths. A value in a VARCHAR2 column can be anything from one to four thousand bytes.
This indicates that a VARCHAR2 column can hold up to 4000 characters for a single-byte character set.
VARCHAR2(max_size BYTE)
NVARCHAR2: Unicode characters can be stored in the NVARCHAR2 data type. The national character set that was specified at the time the database was created is the NVARCHAR2 character set.
SELECT
*
FROM
nls_database_parameters
WHERE
PARAMETER = ‘NLS_NCHAR_CHARACTERSET’;
Date: With a precision of one second, you can save point-in-time values with the date and time included using the DATE data type.
SELECT
value
FROM
V$NLS_PARAMETERS
WHERE
parameter = ‘NLS_DATE_FORMAT’;
The value of NLS_DATE_FORMAT in our Oracle Database system is: DD-MON-RR
TIMESTAMP: You can store date and time information, such as the year, month, day, hour, minute, and second, using the TIMESTAMP data type.
column_name TIMESTAMP[(fractional_seconds_precision)]
INTERVAL: For storing point-in-time data, Oracle offers you two date-time data types: TIMESTAMP and DATE. Furthermore, it offers the INTERVAL data type, which enables the storage of temporal intervals.
There are two types of INTERVAL:
INTERVAL YEAR TO MONTH: This method uses year and month for storing the intervals.
INTERVAL YEAR [(year_precision)] TO MONTH
INTERVAL ‘year[-month]’ leading (precision) TO trailing
INTERVAL DAY TO SECOND: This interval storage keeps track of days, hours, minutes, and seconds, including fractional seconds.
INTERVAL DAY [(day_precision)] TO SECOND [(fractional_seconds_precision)]
TIMESTAMP WITH TIME ZONE: The time stamp and time zone information are both stored in the TIMESTAMP WITH TIME ZONE data type.
TIMESTAMP [(fractional_seconds_precision)] WITH TIME ZONE
Constraints
Oracle has the following constraints to use in the database:
Primary key: A table’s primary key is a column or set of columns that together uniquely identify a particular table row.
When a column meets these criteria, it becomes a main key.
- An empty string or NULL value cannot be found in a primary key column.
- A primary key value needs to be distinct across the whole table.
- It is not advisable to alter a primary key value over time.
CREATE TABLE purchase_orders (
po_nr NUMBER PRIMARY KEY,
vendor_id NUMBER NOT NULL,
po_status NUMBER(1,0) NOT NULL,
created_at TIMESTAMP WITH TIME ZONE NOT NULL
);
Foreign key: The connection is the focal point of a foreign key. To make its concept obvious, let’s begin with an example.
CREATE TABLE suppliers (
supplier_id NUMBER GENERATED BY DEFAULT AS IDENTITY,
supplier_name VARCHAR2(255) NOT NULL,
group_id NUMBER NOT NULL,
PRIMARY KEY(supplier_id),
FOREIGN KEY(group_id) REFERENCES supplier_groups(group_id)
);
NOT NULL constraint: A column cannot have NULL values in it, according to an Oracle NOT NULL constraint. Usually employed in the column specification of the CREATE TABLE statement, the Oracle NOT NULL constraints are inline constraints.
CREATE TABLE table_name (
…
column_name data_type NOT NULL
…
);
UNIQUE constraint: An integrity constraint known as a unique constraint makes sure that the information kept in a column, or set of columns, is distinct from other rows in a table.
CREATE TABLE table_name (
…
column_name data_type UNIQUE
…
);
CHECK constraint: You can ensure domain integrity by restricting the values that one or more columns will accept with an Oracle check constraint.
CREATE TABLE table_name (
…
column_name data_type CHECK (expression),
…
);
Conclusion
We hope this basic concept of the Oracle tutorial will be helpful to get started with your Oracle learning. Learn everything with hands-on exposure in our Oracle training in Chennai.